Documentation
1. Getting Started
1.1 Installation
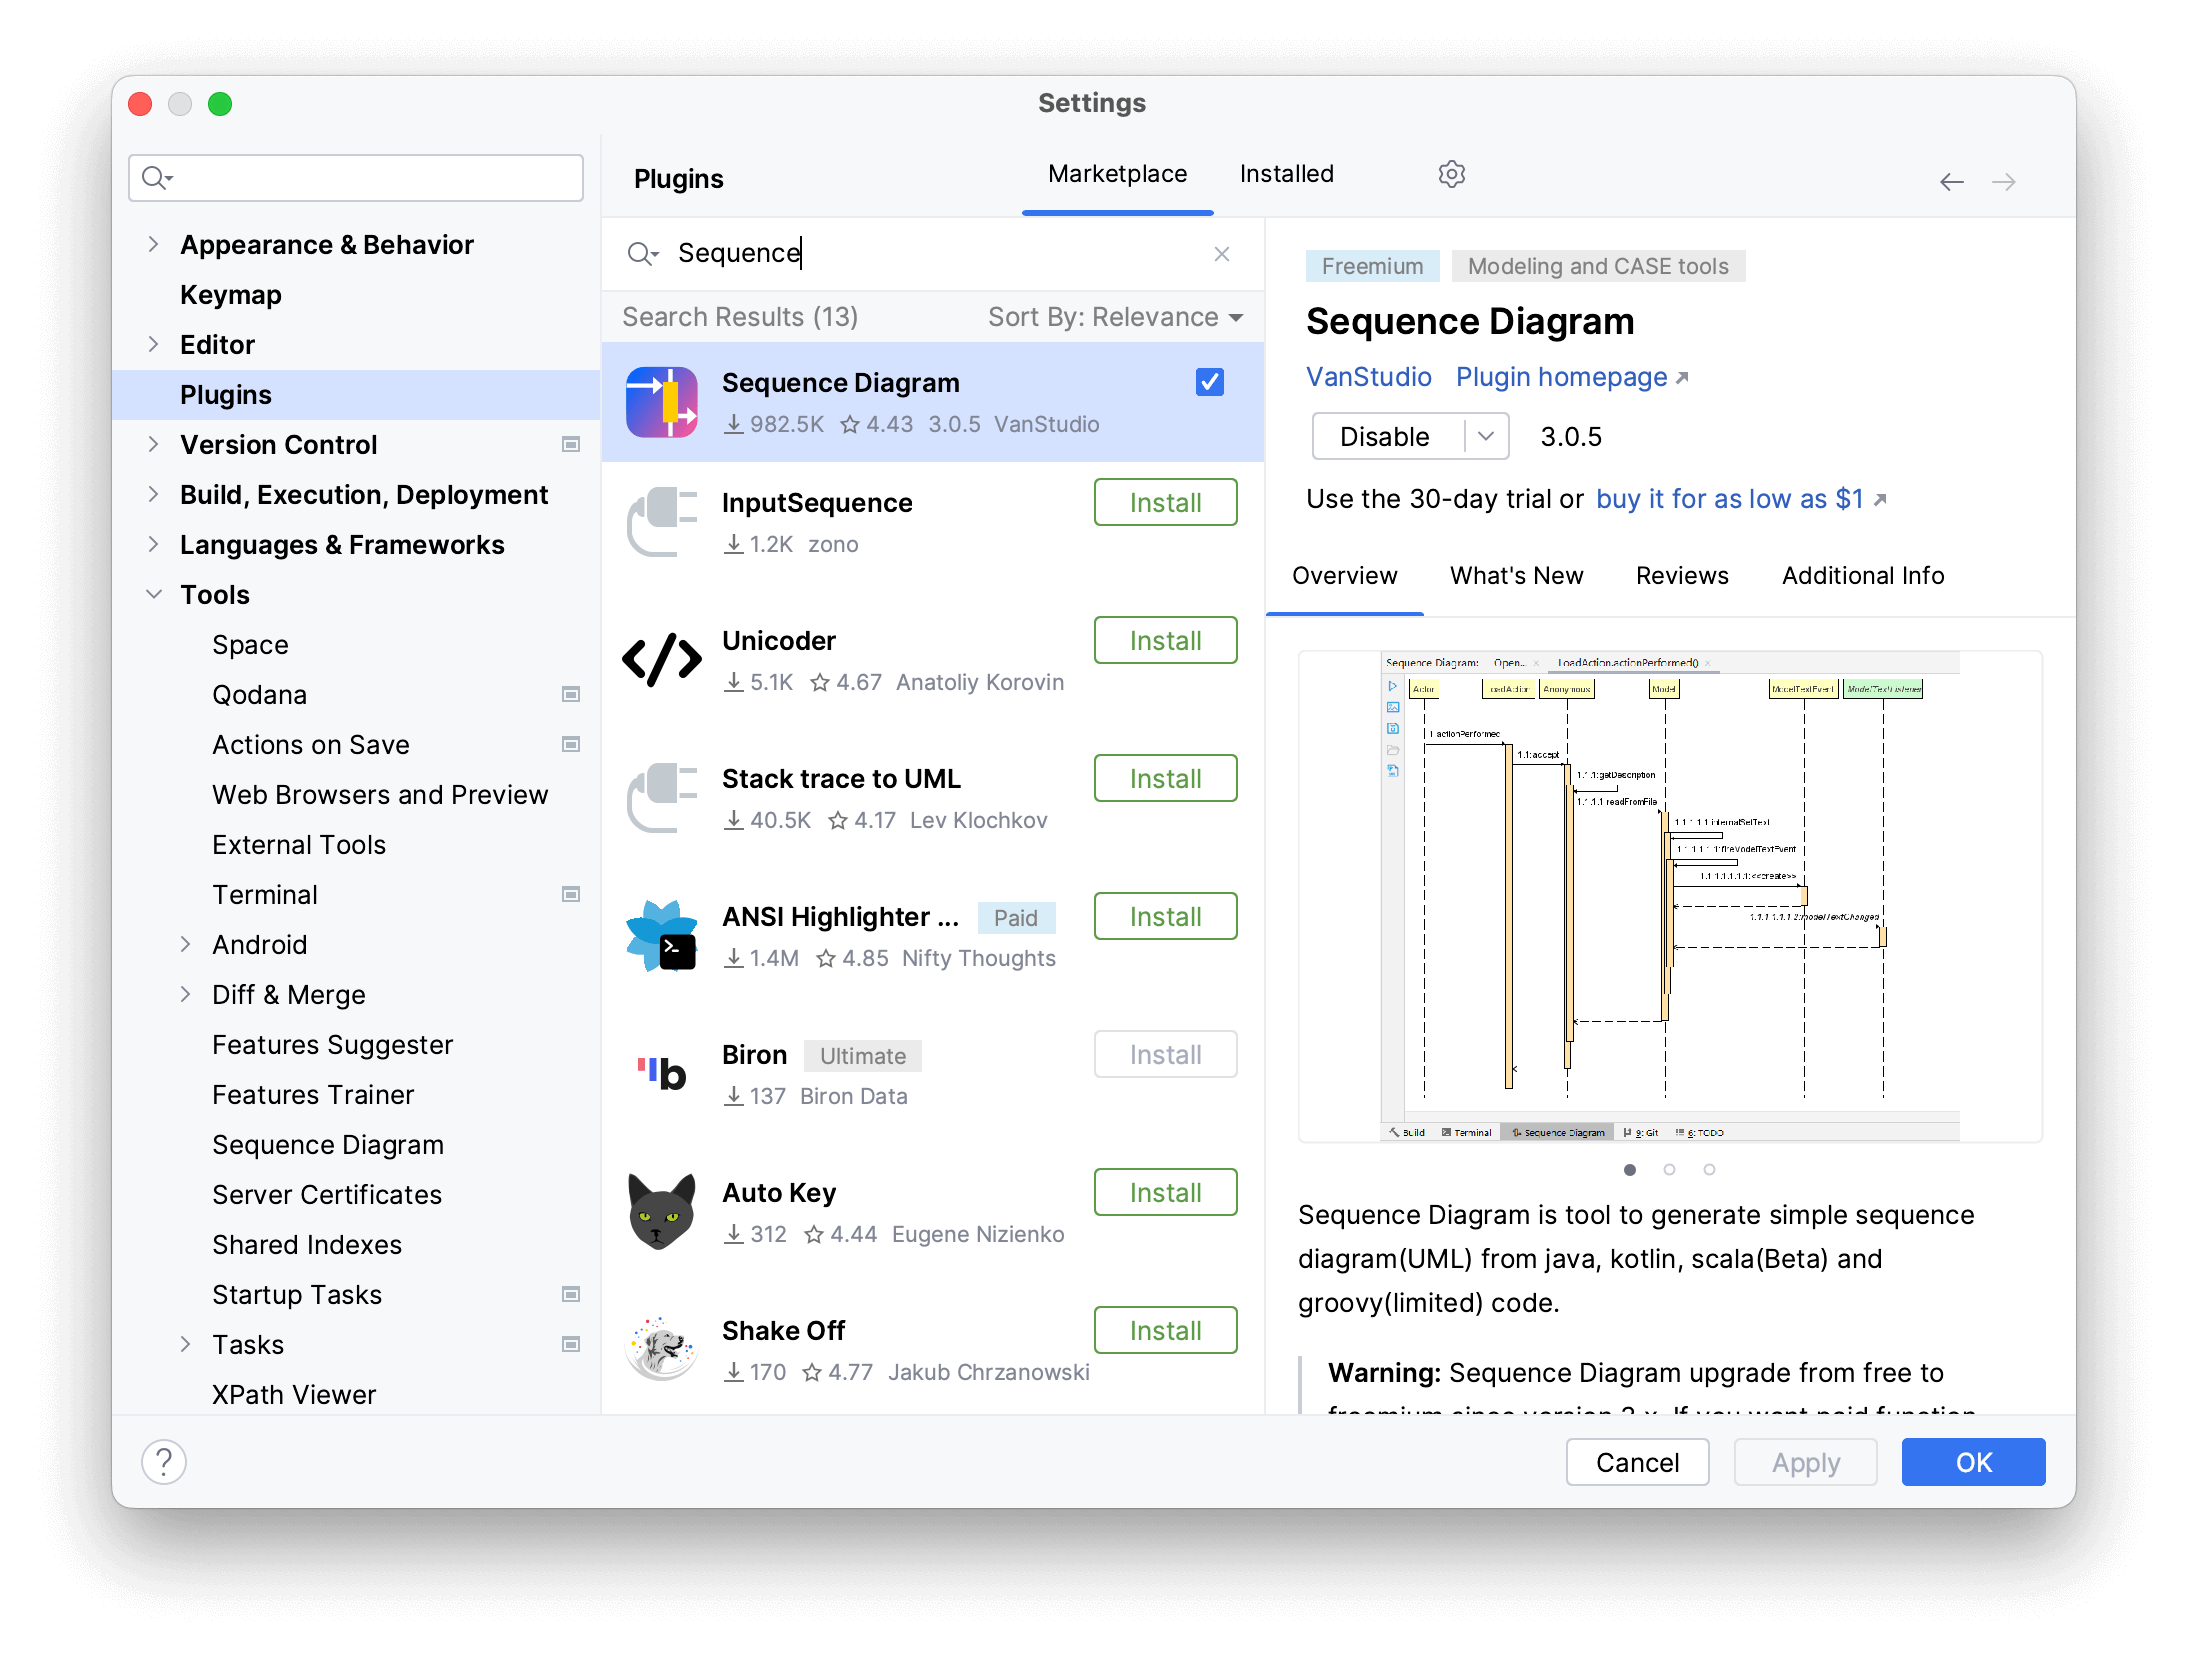
The SequenceDiagram is a plugin, you can install from the marketplace:
- goto `Settings > plugins`
- and search `SequenceDiagram` will find it,
- then click install button.
Or you install here:
Tips:
- SequenceDiagram Core must be installed.
- SequenceDiagram Java is installed on-demand,
- SequenceDiagram JS is installed on-demand,
- SequenceDiagram Go is installed on-demand,
- SequenceDiagram Python is installed on-demand,
- SequenceDiagram Rust is installed on-demand,
- SequenceDiagram C/C++ is installed on-demand.
But at least one language module needs to be installed.
1.2 Quick Access
Take Java as an example. When SequenceDiagram Core and SequenceDiagram Java are installed. You can quickly access it with shortcut-keys:
- Open `JAVA`, `kotlin`, `Scala` file
- Generate sequence diagram with shortcut `Alt S` for windows, `Option S` for macOS.
Tips:
- Place caret at name of method will fastest, generate diagram for the method.
- Place caret at class name, will pop up list to choose which method to be generated.
- Place caret at anywhere in the source file, will pop up choose list too.
- Place caret at files other than `JAVA`, `kotlin`, `Scala`, will raise info window say `Unsupported source file.`
1.3 Code navigation

Code navigation is powerful function of SequenceDiagram plugin. When you generated a diagram for the method, you can double-click the shape in the diagram to jump to the code:
- Double-click the call link name, will jump to the code call the method.
- Double-click the method bar, will jump to the method definition.
- Double-click the class name will open the class.
Or, you can navigate to code by choose context menu `Go to Source`.
Tips:
- Double-click implementation dummy call, or double-click its method bar, will jump to the same place: the definition of implemented method.
2. Advanced Usage
2.1 Generate Settings
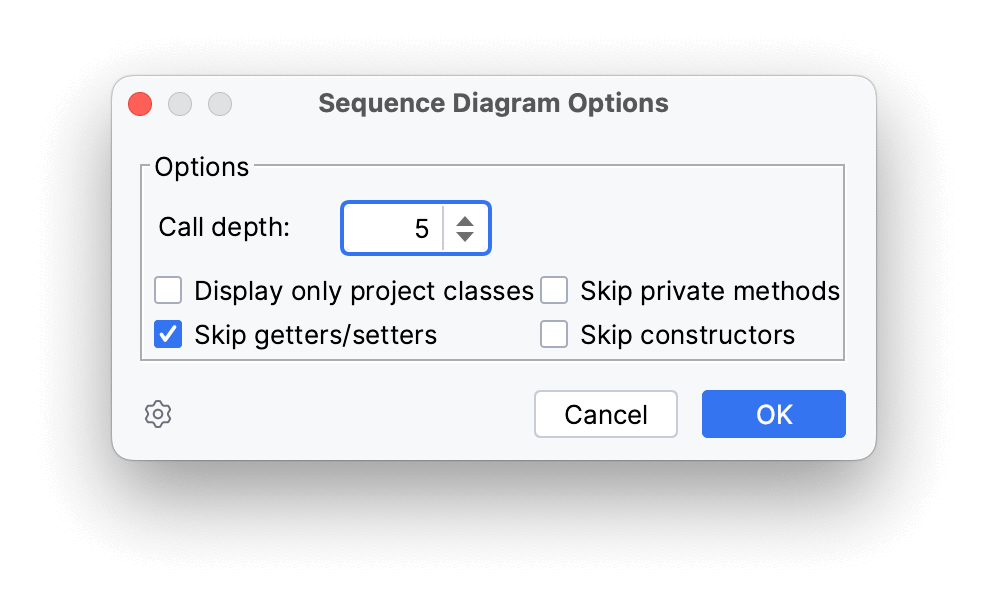
You can make some options before you generate.
- Open Sequence Diagram tool window in idea.
- Click``to open `Sequence diagram options` windows,
- then make some choice.
Tips:
- Uncheck the `Display only project classes` option, will fast the generation process, because classes outside the project will trigger the decompile process.
- Click`` in the bottom of `Sequence diagram options` windows, will open system settings of SequenceDiagram, more setting can be set there.
2.2 System Settings
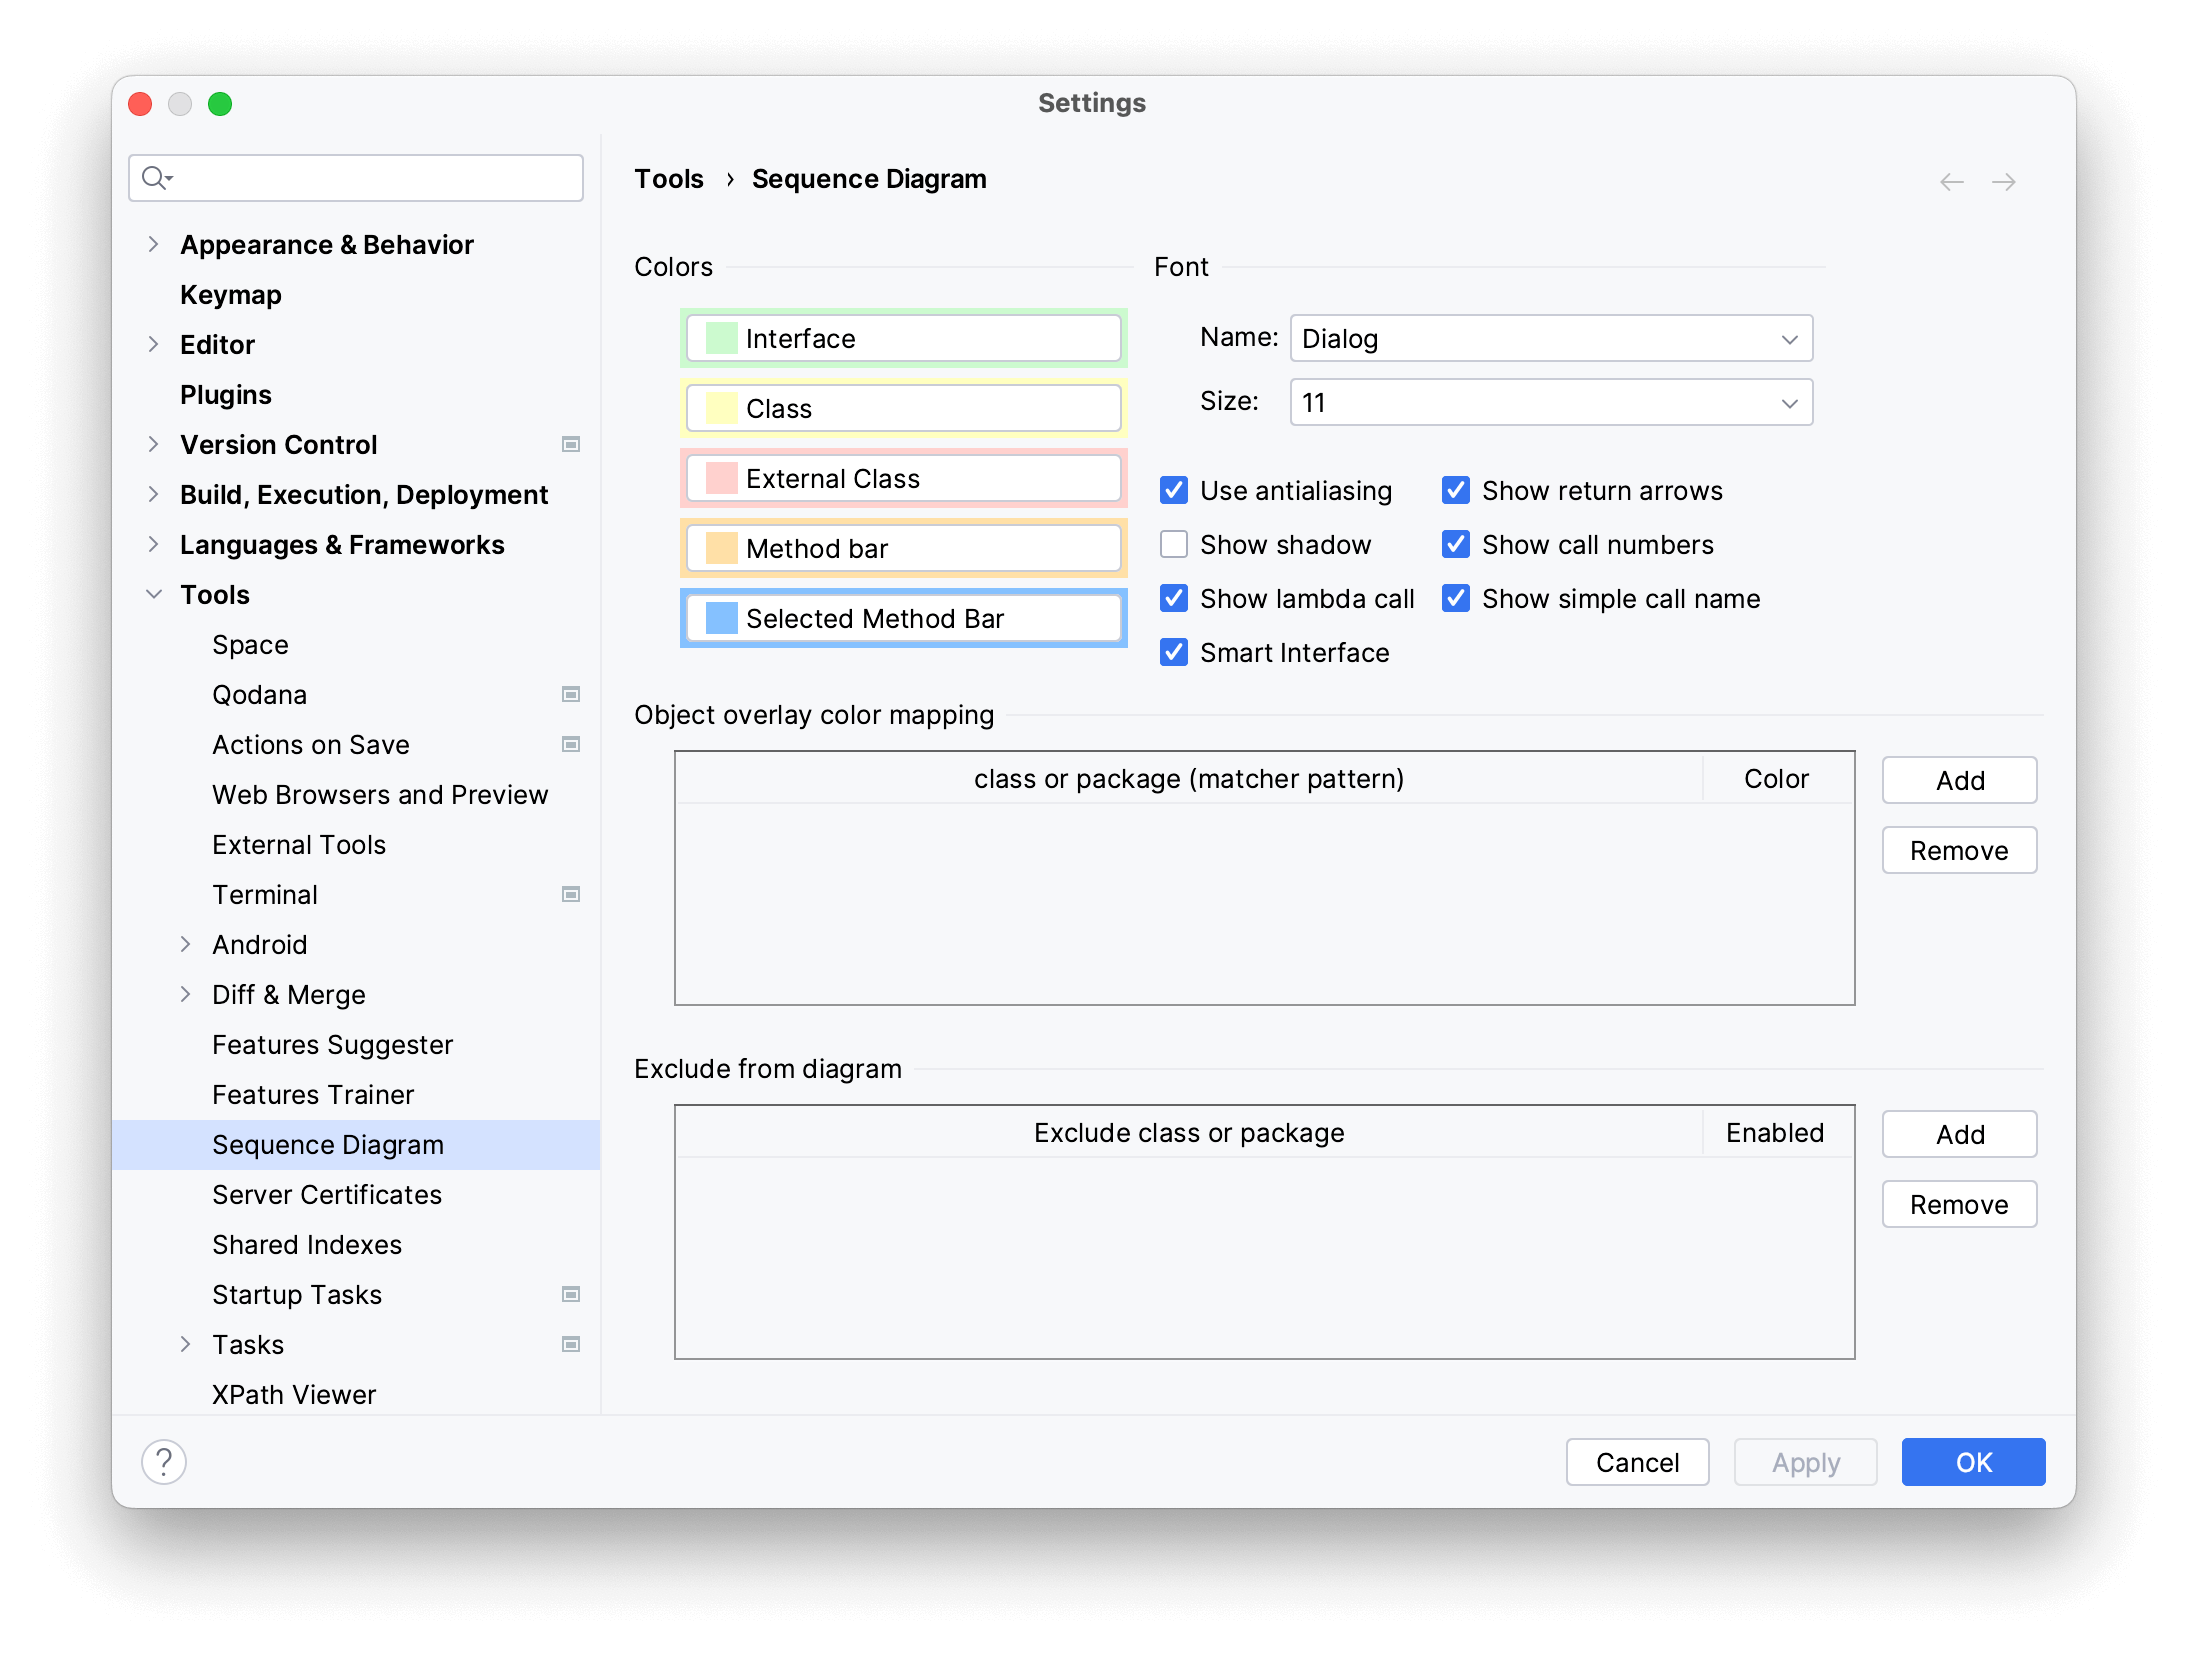
SequenceDiagram plugin has more setting place in Idea's system settings. You can customize color of shape, font, and some useful options.
- Open Idea's `Settings...`
- Navigate to `Tools` > `SequenceDiagram` in side tree to open the system settings for SequenceDiagram.
Tips:
- `Object overlay color mapping` setting are useful, when you need tag some class you concern. It will show additional color dot overlay on the class shape.
- `Exclude from diagram` setting are more powerful, when you need exclude some class from generate process.
2.3 Remove shape
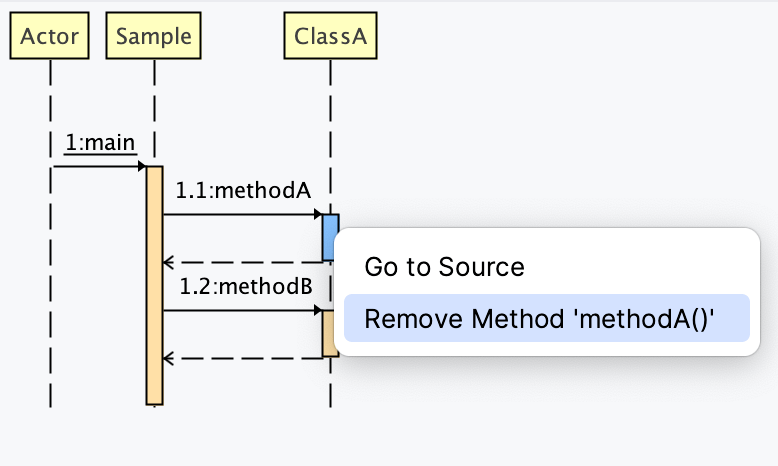
After the sequence diagram generated. You can still customize the diagram by remove shapes, which will make diagram more clean as you wish. The `Remove ***` action are locate in the context menu:
- Right click class shape, `Remove class 'ClassA'`, will remove class from diagram.
- Right click method bar, `Remove Method 'methodA()'`, will remove the method and it's subsequence.
- Right click call link same as method bar.
Tips:
- How to reverse removed shape? you can use `Filter manager` to manage all the removed actions. You can reverse single remove action, clear all removed actions.
- The remove action will not change the source code, it only removes shape from diagram.
2.4 Filter Manager
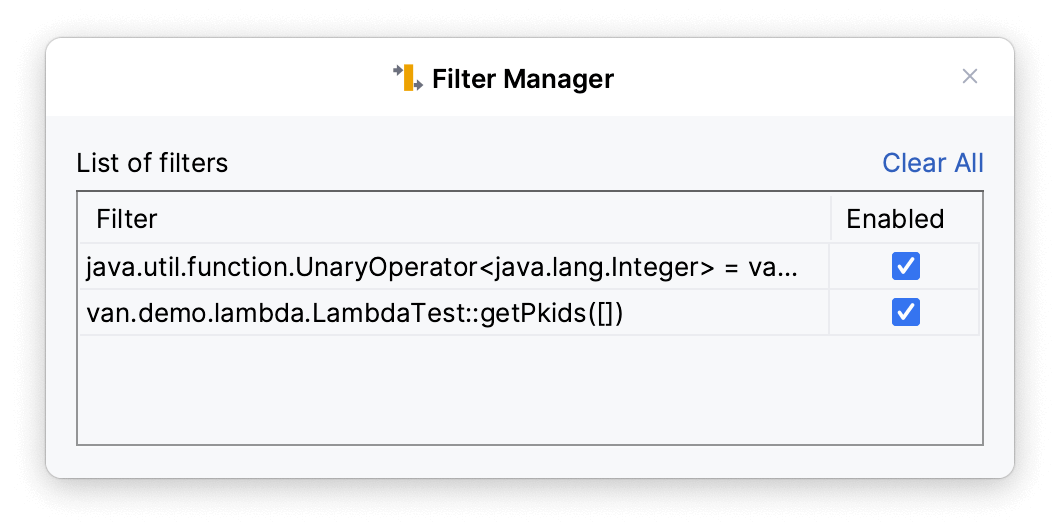
Filter manager is tool useful when you remove shape from diagram, and you regret the deletion.
- Click the `` toolwindow icon to open `Filter Manager` window.
- Disable/Enable the filter(remove method or class).
- Click `Clear All` to clean all filters.
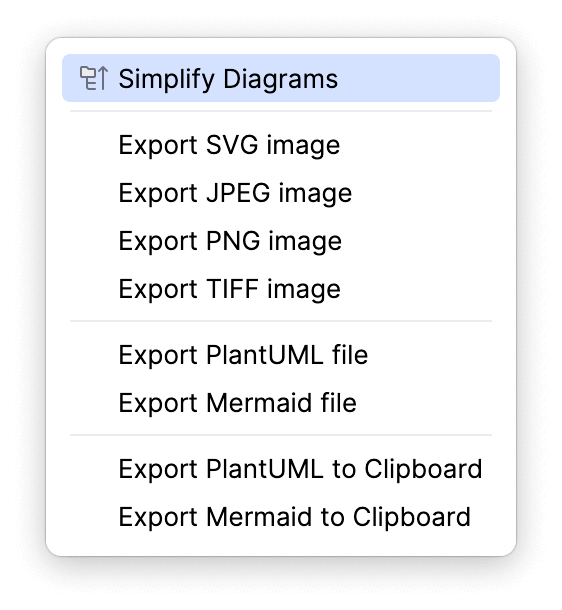
2.5 Export Diagram
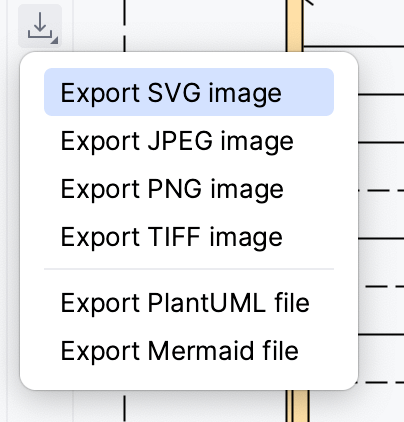
SequenceDiagram plugin support export diagram as image file, SVG, PNG, JPG, TIFF or as plantUML, Mermaid file.
- Click `` toolwindow icon to show export menu
- Choose export menu, a file name dialog windows will ask the export file name and location.
- Click `OK` confirm the export.
Tips:
It is recommended to export images in SVG format.
When generating sequence diagrams, depending on different settings, it often produces very large images. Due to the limitations of Apache Batik, processing larger images requires a lot of memory, which can occasionally trigger OutOfMemoryError. To avoid frequently changing the Java memory settings, we adopted a compromise approach: when the image exceeds 32M pixels in length × width, it will automatically be split into 8k-sized PNG tiles for export. A shell script is also provided to assemble multiple tiles into a complete large image. This requires the user to have an additional library, ImageMagick, installed on their computer.
Formats like PNG, JPG, and TIFF all rely on Apache Batik for transcoding, so they are subject to the size limitations mentioned above. Images with a length × width less than 32M are not affected and will also be exported as a single image file.
2.6 Expend Implementation
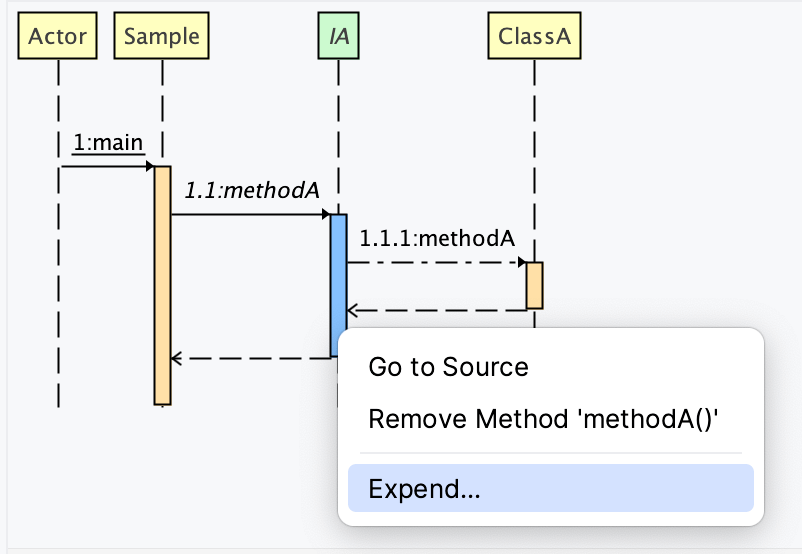
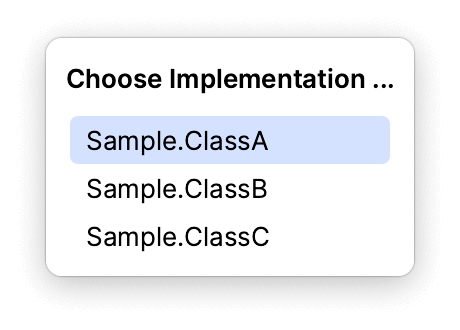
Scenario: interface `IA` with many implementations `ClassA`, `ClassB`, `ClassC`.
    interface IA {
        void methodA();
    }
when generate sequence diagram for the method `main`,
    public void main(IA a) {
        a.methodA();
    }
Right-click on the method bar of `methodA`, will show a menu `Expend...`, click it, pop up a list of implementations for you, choose one of them to show in the diagram.
Tips:
- the expend function only work for those interface, `Smart Interface` fail to find correct
implementation. e.g. when generate sequence diagram for the method `main2`:
    public void main2() {
        IA a = new ClassA();
        a.methodA();
    }
the `Smart Interface` will find `ClassA` as an implementation for interface `IA`. Only ClassA will draw in the diagram, even you `Expend...` and choose a different implementation, ClassB or ClassC. - Some time you can disable the `Smart Interface` in settings, when you need choose implementation by hand.
2.7 Simplify Diagrams


Add `Simplify Diagrams` menu: Promote the public method call inside a private method up to its caller method. e.g.
public class BriefPubClass {
    public String pubMethod() {
        priMethod(true);
        return "Pub";
    }

    private void priMethod(boolean condi) {
        if (condi) {
            priMethod2();
        } else {
            priMethod3();
        }
    }

    private void priMethod2() {
        BriefCallClass briefCallClass = new BriefCallClass();
        briefCallClass.callOtherPubMethod();
        priMethod4();
    }

    private void priMethod3() {

    }

    private void priMethod4() {

    }
}

public class BriefCallClass {

    public void callOtherPubMethod() {
        System.out.println();
    }
}
When diagram for method `pubMethod` was generated, the original sequence diagram (left upper) show all method call in deeps, includes private methods.
`pubMethod()` --> `priMethod()` --> `priMethod2()` --> `BriefCallClass.callOtherPubMethod()`
When the menu 'export' > 'Simplify Diagrams' is selected, the diagram promotes the public method calls within the private method to its caller method, leaving the only public method call 'BriefCallClass.callOtherPubMethod()' as if it were called directly in 'pubMethod', and all private method calls disappear (bottom left).
This feature is suitable for people who are very concerned about calls between classes.
`Simplify Diagrams` is differed from `Skip Private Method`: the latter skips both the priMethod and its child calls.
3. MCP Tools
3.1 generate_sequence_diagram
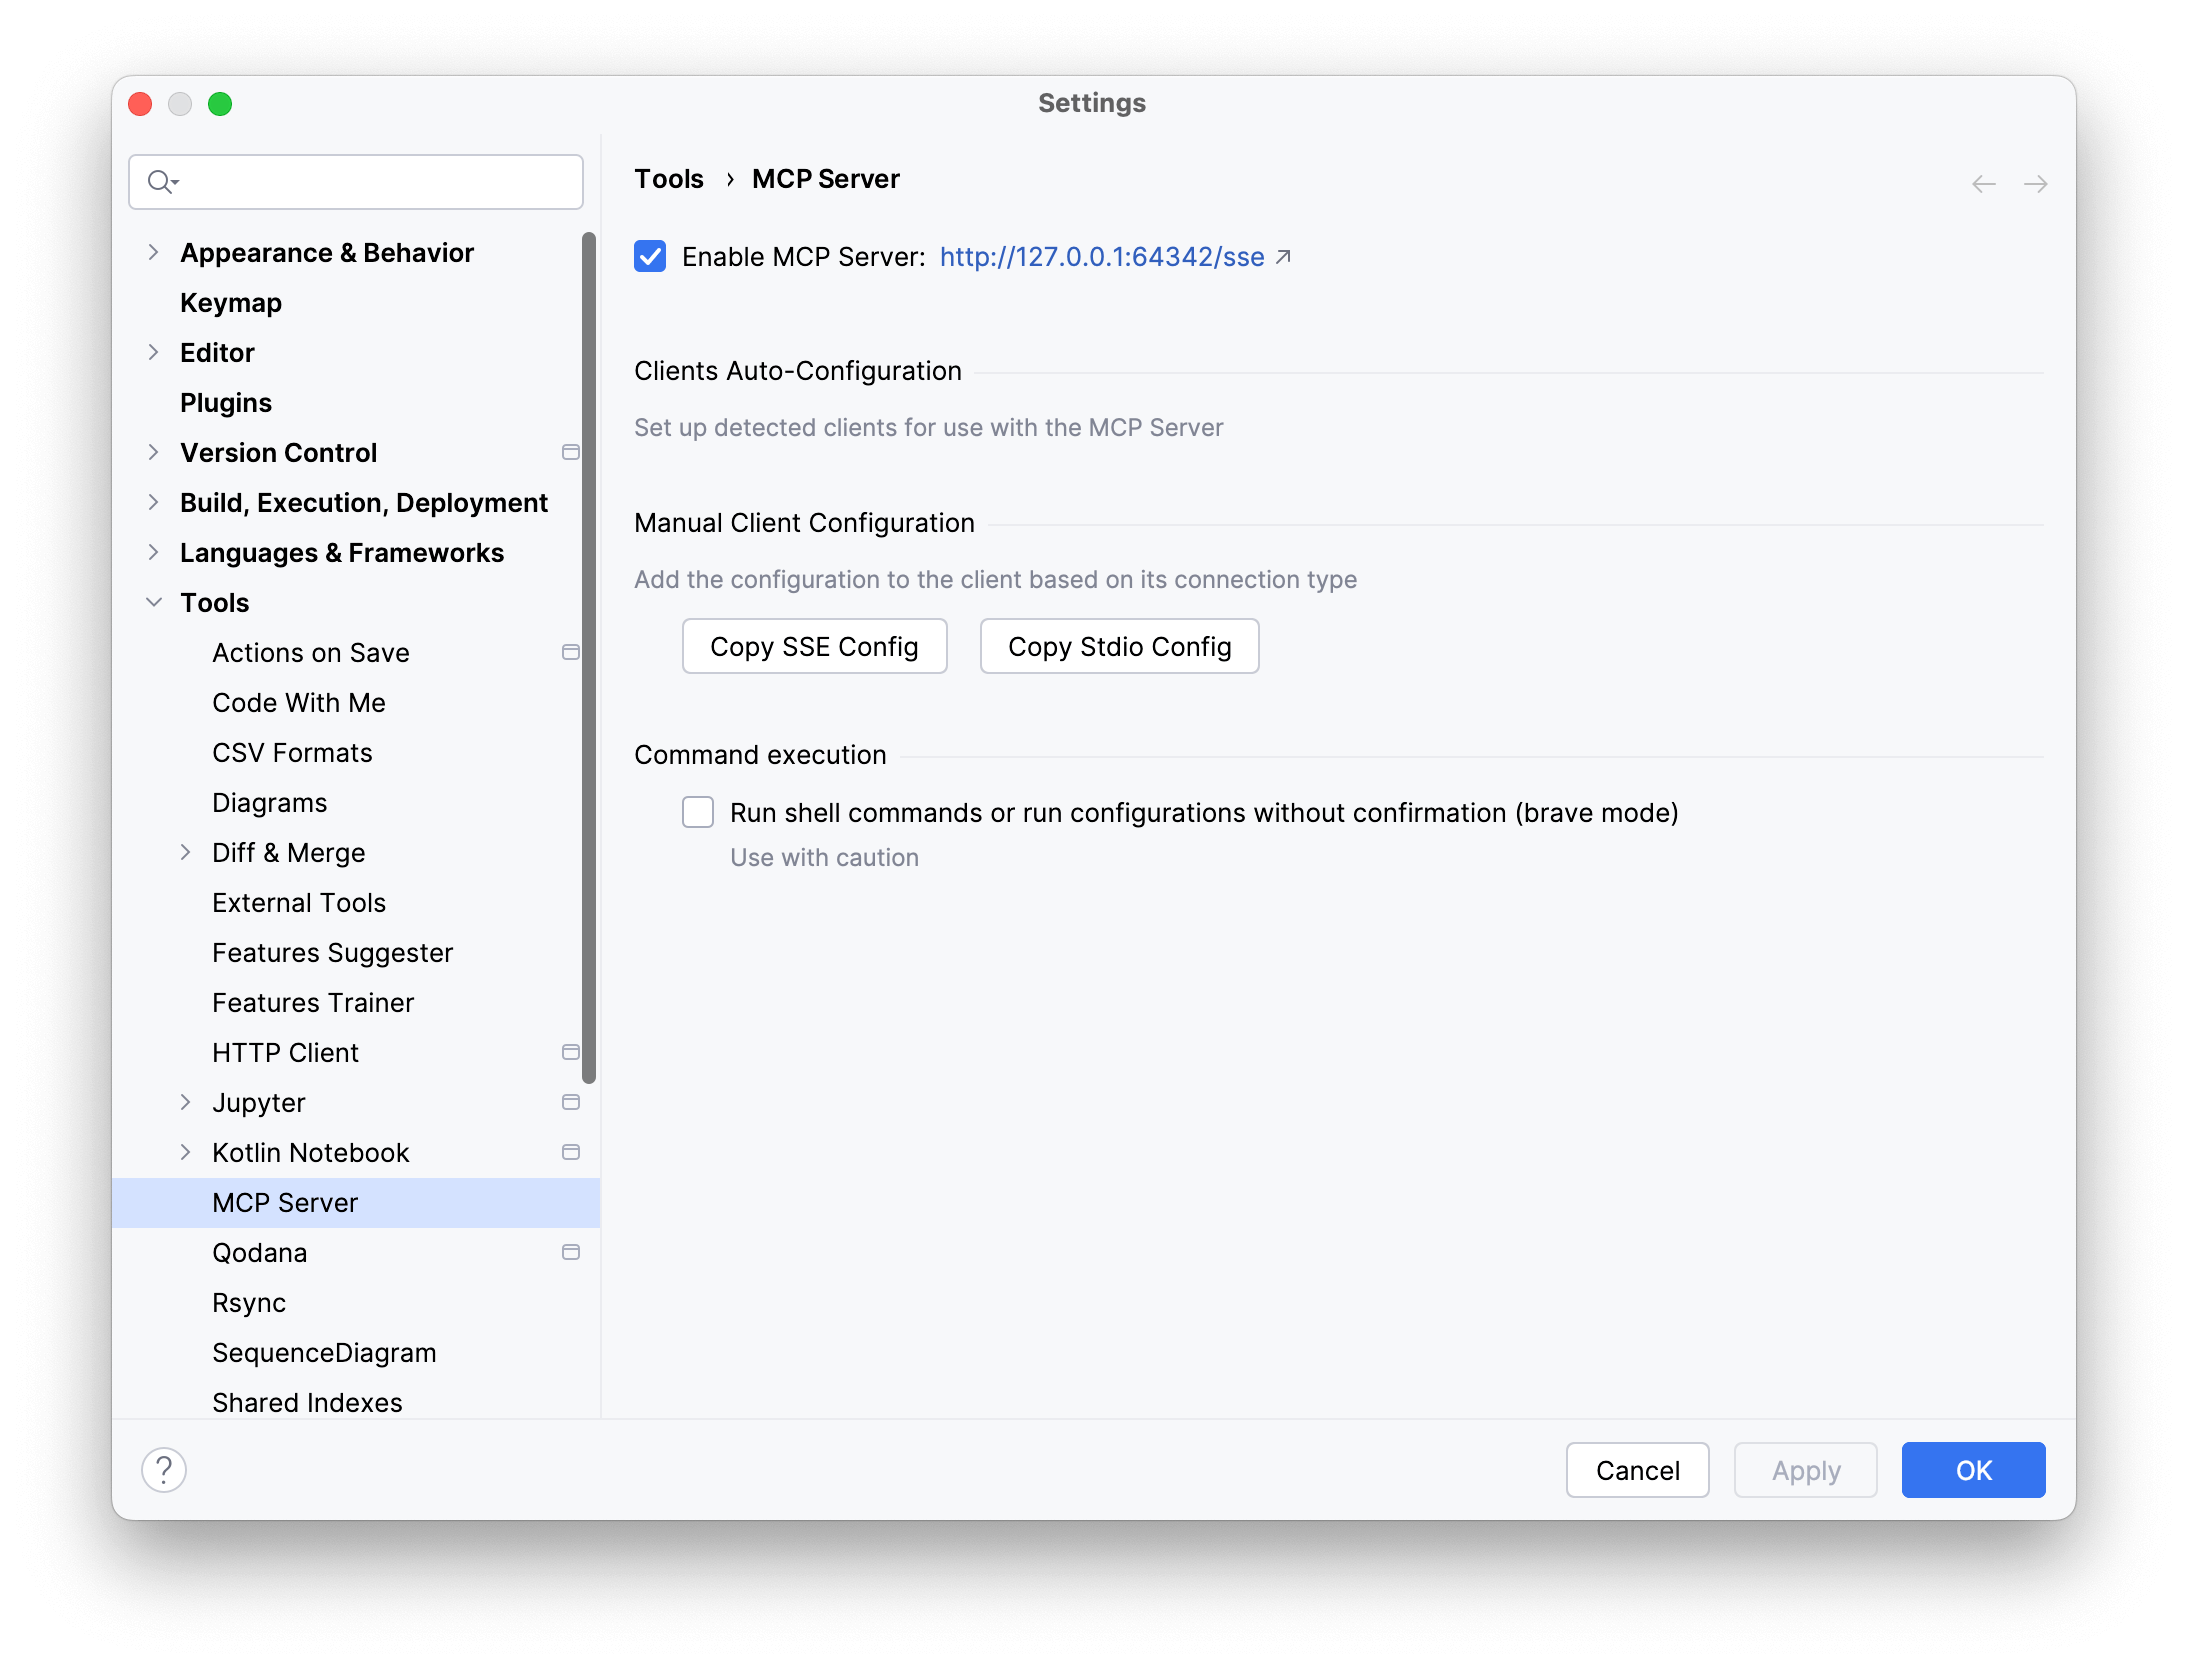
To Use the MCP Tool: generate_sequence_diagram, you need to enable MCP Server first. (The MCP Server was provided by Jetbrains.)
Use the `generate_sequence_diagram` in your favorite MCP Client
        Generate sequence diagram for method/function.
        Use this tool when you want to generate the sequence diagram for specific method
        or function.

        Requires three parameters to generate sequence diagram.
            - filePath: The relative path to the file from the project's root directory
              (e.g., `src/java/com/foo/bar/Demo.java`)
            - symbolName: The exact, case-sensitive name of the existing symbol, method
              or function (e.g., `getUserData`)
            - timeout: Timeout in milliseconds. defaults 3000

        The result string is Line Feed separated string in Mermaid sequence diagram format.